Leaf & Coil Springs for US Cars: Selection and Installation
How to correctly select leaf and coil springs for US vehicles, check their fit and carry out the installation cleanly in your home workshop.
Function of Leaf and Coil Springs in US Cars
Leaf and coil springs are central components of the suspension. They support the vehicle weight, ensure ground clearance and determine ride comfort and handling. Especially in US vehicles with high curb weight, trailer use or off‑road operation, springs are heavily stressed and wear out correspondingly faster.
In general:
- Leaf springs are predominantly found on the rear axles of pickups, vans and some SUVs.
- Coil springs are usually located on the front axles and on the rear of many newer SUVs.
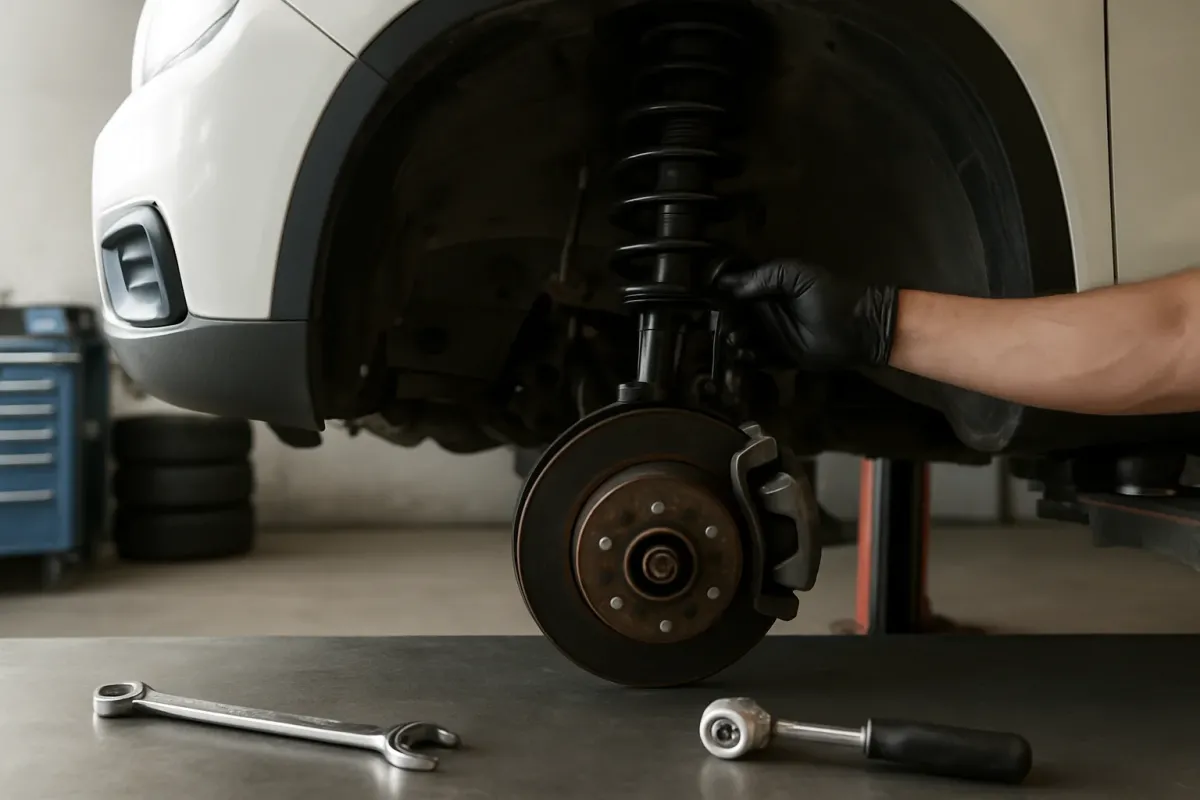
- Combinations of strut (damper + coil spring + strut mount) are common on the front axles of modern US SUVs and sedans.
You can find a wide selection of suitable components in the category Blatt- & Spiralfedern.
Leaf Springs: Construction, Variants and Typical Problems
Leaf springs consist of several steel plates (“leaves”) stacked on top of each other and clamped or banded into a pack. In many US pickups they simultaneously serve as the axle locating link and are often used to adjust ride height under load.
Common designs in US vehicles
- Multi-leaf spring packs with a main leaf and supplementary leaves (also called “overload leafs”).
- Parabolic leaf springs with a variable cross-section, more commonly found in aftermarket upgrades.
- Leaf springs with auxiliary air suspension (air bellows added), especially for trailer use.
Wear and damage patterns
When performing a visual check, look for the following signs:
- The rear of the vehicle sags or sits noticeably crooked.
- Markedly reduced ground clearance when loaded.
- Cracks in the leaves, especially in the arch area and at the bolt holes.
- Corrosion, severe thinning of the material.
- Loose or broken spring clamps, worn rubber bushings at the spring eyes and shackles.
If there are cracks or breaks in the leaf pack, the complete spring must be replaced. Continuing to drive can result in loss of axle location.
Coil Springs: Types and Use in US Cars
Coil springs occur in various designs and are part of a MacPherson strut on many US SUVs and sedans.
Different coil spring types
- Linear wound springs with a constant spring rate, classic in many standard suspensions.
- Progressive springs with variable pitch of the coils, offering more comfort in everyday use and more reserve under heavy compression.
- Lift or lowering springs, depending on intended use (off‑road vs. street sport).
Common wear symptoms
- Broken spring, often at the lower seating area or where rust has formed.
- Sagging: the vehicle sits lower, spring travel is reduced.
- Clunking noises due to missing or damaged rubber seats.
On modern US SUVs, coil springs are often replaced together with the shock absorber and strut mount as a unit. Examples are complete strut assemblies for the Jeep Grand Cherokee (2005–2010) or the Ford Explorer (from 2013).
Choosing the Right Spring: Important Criteria
For a proper fit and correct handling, it is not enough to choose “approximately fits”. Several points are decisive:
Determine vehicle data exactly
Have the following information ready when selecting:
- Manufacturer, model, year and body style.
- Engine and drivetrain type (e.g. 4WD, AWD, RWD, 2WD).
- Axle loads front/rear (listed in the registration document).
- Special equipment: e.g. trailer hitch, heavy gas system, specific off‑road packages.
Even small differences — for example between 4WD and 2WD — can lead to different spring rates or lengths, as seen in the different variants for the Dodge Dakota (4WD/RWD).
Stock height vs. changing vehicle height
Before purchase, consider whether you want to keep the factory ride height or change it:
- Stock height: replacement springs with OE‑like spring rate, suitable for everyday use and towing within factory limits.
- Lift: different springs or spacer plates to improve ground clearance and approach/breakover angles (off‑road, camper conversion).
- Lowering: stiffer springs, often combined with sport dampers (especially for sedans and sporty models).
Height changes may require approval and registration. Always check national regulations and certificates.
Check Fitment: Inspect Before Installation
Before final installation, always compare new springs with the old ones:
- Compare length in the removed state roughly.
- Shape of the ends on coil springs (open/closed end, seat position).
- Width and curvature of leaf springs.
- Diameter of the spring eyes and position of the bushings.
- Position of the centering bolt in the leaf pack.
Minor cosmetic differences can be normal if the old springs are already heavily sagged. Major differences (wrong eye width, completely different end shape) are a clear sign of the wrong spring.
Installing Leaf Springs: Steps and Notes
The following notes provide general guidance. Always refer to the repair manual or the workshop manual of your vehicle for specific torque values and details.
Preparation
- Securely jack up the vehicle and prevent it from rolling.
- Support the rear axle separately with a transmission jack or second hydraulic jack.
- Check brake lines and ABS sensor wires, if necessary disconnect to avoid tension.
Removal
- Remove the rear wheels.
- Disconnect the shock absorber at the axle lower mount.
- Evenly loosen and remove the U‑bolts of the spring plate.
- Loosen the front spring eye and remove the bolt.
- Loosen the rear spring eye or shackle and remove the spring pack.
Installation
- Equip the new leaf spring with the correct rubber bushings if not preassembled.
- Place the spring into the mounts, first loosely install the front spring eye only.
- Mount the rear spring eye/shackle, also only hand‑tight.
- Align the axle with the centering bolt, mount the U‑bolts with the spring plate.
- Tighten the U‑bolts in a cross pattern to the torque values specified in the manual.
- Reinstall the shock absorbers.
- Lower the vehicle onto its wheels and let the springs “settle”.
- Only now tighten the bolts at the spring eyes and shackles to the prescribed torque in the loaded state.
Tightening the mounts in the unloaded state causes preloading and premature wear of the rubber bushings.
Installing Coil Springs and Strut Assemblies
On many US SUVs today complete strut assemblies are replaced, where the shock absorber, coil spring and strut mount form a preassembled unit. Examples are sets for the Chevrolet Equinox (2007–2017) or the Dodge Dart (from 2013).
Installation notes for complete strut assemblies
- Raise the front of the vehicle, remove the wheels.
- Disconnect the brake line bracket and ABS sensor line from the strut.
- Disconnect the stabilizer link from the strut.
- Loosen the lower attachment(s) of the strut at the steering knuckle or control arm.
- Loosen the upper strut mount fasteners in the engine bay and remove the strut downward.
- Install the new strut in the reverse order.
- Tighten all bolts to the torque values specified in the workshop manual.
When working with non‑preassembled coil springs, a suitable spring compressor is absolutely required. Improper handling of compressed springs is dangerous. If you are unsure here, have the strut preassembled or engage a professional workshop.
After the spring change
- Turn the steering from lock to lock several times and listen for noises.
- Carry out a test drive and check for rattles or banging.
- Have a wheel alignment performed afterwards – especially after work on struts or suspension.
Common Mistakes When Replacing Springs
- Single‑side replacement only on one side of the vehicle: leads to crooked stance and uneven handling. Always replace springs by axle.
- Incorrect bushing position: twisted or incorrectly installed rubber bushings at spring eyes or strut mounts can lead to preload and noise.
- No de‑rusting of the seating surfaces: rust and dirt under spring seats cause creaking noises and uneven load distribution.
- Reusing old mounting parts even though they are worn (e.g. U‑bolts, silent blocks, strut mounts).
- No check of axle geometry after installation, which can cause increased tyre wear.
Safety and Documentation
Work on suspension and springs directly affects vehicle handling. Therefore observe:
- Always use secure jacking points and work with axle stands.
- Take torque values, sequences and special requirements (e.g. stretch bolts, self‑locking nuts) exclusively from the official workshop manual or repair guide.
- After major changes to height or spring rate, clarify legal requirements and possible registration obligations.
Frequently Asked Questions
Do I always have to replace springs in pairs per axle?
Yes, springs should generally be replaced by axle. A new spring on only one side leads to uneven vehicle height and altered handling. It can also cause uneven braking behaviour and increased wear on other suspension components.
Can I use other springs to raise my US car?
In principle, a lift can be achieved with different springs or auxiliary components. However, you must observe the permissible axle loads, wheel‑to‑tyre clearance, possible effects on steering geometry and brake lines, as well as the legal situation. Use only components approved for your model and consult an inspection body or a specialist workshop.
What torque values apply to spring and suspension bolts?
The specific tightening torques depend on the vehicle model, the axle design and the bolts used. These values must not be estimated. Rely exclusively on the official workshop manual or recognised repair databases for your exact model and year.