Fenders, Quarter Panels & Fuel Filler Caps for US Cars: Practical Guide
Fenders and fender flares: what to check before buying. Compare vehicle fitment, kit contents and relevant products.
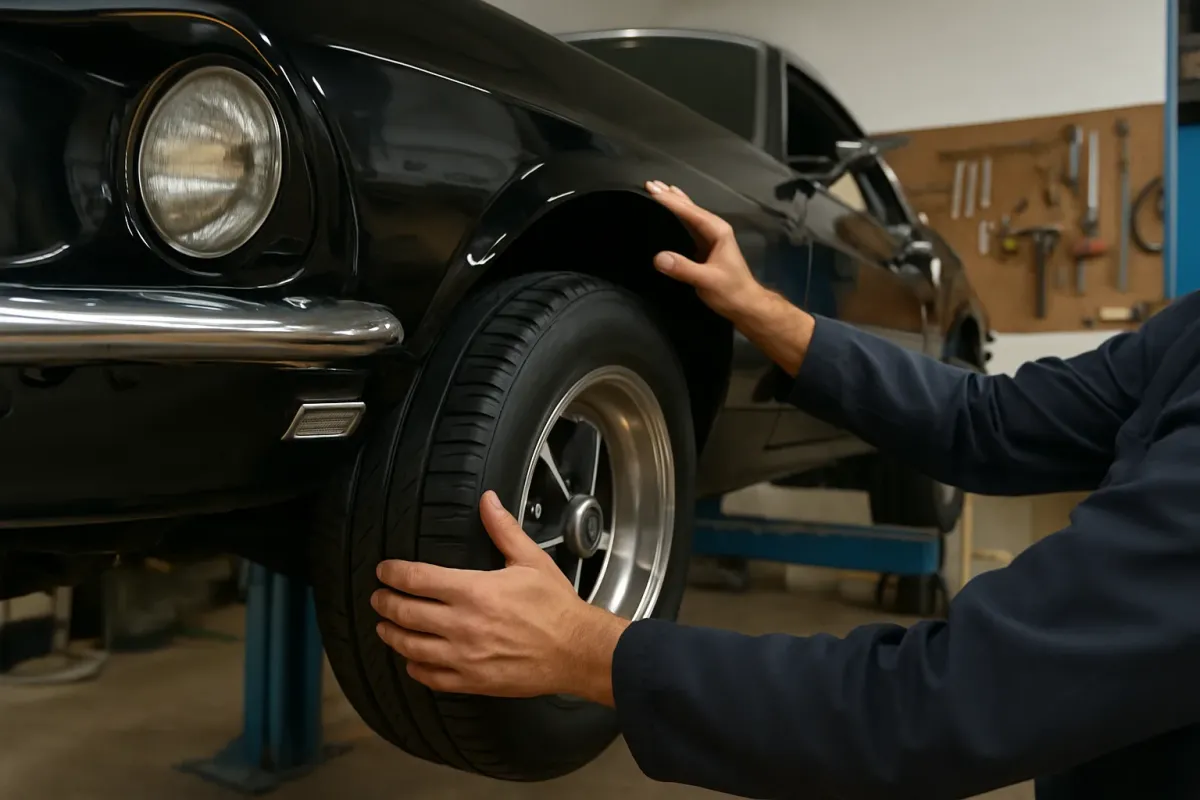
Overview: Body parts around the wheel arch and fuel area
Fenders, side panels and fuel caps are among the body parts that are replaced or modified particularly often on US cars — whether after an accident, due to rust or for a wider wheel/tire setup. If you do the work yourself, you must above all pay attention to correct fitment, material and the proper installation sequence.
This guide provides tips for selecting suitable parts, typical differences between OEM and aftermarket parts, as well as practical advice for disassembly, modification and installation of fenders, side panels and fuel filler doors on US vehicles.
Part types and materials: What is used where?
Front fenders
Front fenders are usually bolted-on components. They are relatively straightforward to replace because they are not welded to the side panel. In the shop you will find a dedicated category for them:
Kotflügel vorn
Typical materials:
- Steel sheet: close to production specifications, easy to repair and weld, susceptible to corrosion if not properly sealed.
- Aluminum: lower weight, corrosion-resistant (but watch for galvanic corrosion), different repair techniques for dent removal.
- GRP / plastic (aftermarket): common in wide‑body kits or styling parts, often requires more fitting work.
Examples of aftermarket aluminum front fenders are the front aluminum fenders for Ford Mustang 2015–2017 in GTD style or the fenders for Mustang 2018–2023 in GT350 style, which differ from the production parts both in material and visually.
Side panels and rear wheel arches
Rear side panels (quarter panels) are part of the load-bearing body structure on many US cars and are usually welded. The approach depends on the damage situation:
- Complete side panel: replaces the entire side section; extensive welding and fitting work, often a frame straightening bench is recommended.
- Repair panel / wheel arch section: replacement of only the affected area, e.g. the wheel arch lip.
An overview of the relevant parts can be found in the category Seitenwände & Kotflügel hinten.
Fuel caps and fuel filler doors
In the fuel area a distinction is made between:
- Simple fuel cap (screw cap or bayonet closure)
- Fuel filler door (outer flap in the side panel)
- Complete module (door, bracket, hinge, possibly lock)
When converting to a wide‑body or when replacing side panels, it is important to know how the area around the fuel opening is constructed and whether additional modifications will be required.
Checking fitment and compatibility correctly
Determine vehicle data exactly
US vehicles often have different body variants depending on the year, facelift and trim level. Therefore always check:
- exact model (e.g. Mustang GT vs. EcoBoost, RAM 1500 vs. 2500/3500)
- year of manufacture and model year (these can differ)
- body style (coupe, convertible, pickup, SUV)
- trim/performance line (e.g. Camaro LT, SS, RS etc.)
The vehicle documentation or the manufacturer's VIN decoder helps with exact identification. Do not rely on estimates for safety‑relevant body parts.
Original part, reproduction or tuning part?
Three types of parts are commonly used on US cars:
- Original parts (OEM): generally best fit, suitable reference for panel gaps.
- Reproductions (repros): fit can vary by manufacturer, often more adjustment work required.
- Tuning / wide‑body parts: deliberately altered geometry (wider wheel arches, different contour) such as the wide‑body fender flare for Dodge Challenger 2015–2024. Additional fitting work (cutting, riveting, bonding) is common.
Check fitment before painting
Regardless of the manufacturer, new fenders, side panels and fuel filler doors should always be test‑fitted in raw condition (unpainted or with transport primer):
- check panel gaps to doors, bumper, hood and headlights
- verify alignment of mounting points and brackets
- for filler doors: test opening angle and alignment to the body edge
Necessary rework (drilling, slight metal corrections) should always be done before painting to avoid damaging the finish.
Tools and preparation in the home workshop
For simply replacing bolted front fenders, a well‑equipped home workshop is sufficient in many cases. For welded side panels, however, professional facilities (frame bench, spot welder, body alignment tools) are often indispensable.
Typical tools for front fenders
- socket set with common SAE (inch) and, if applicable, Torx/E‑Torx bits
- ratchet, extensions, universal joints
- plastic prying tools for removing clips and trim
- screwdrivers, combination pliers, needle‑nose pliers
- marker or masking tape for marking panel gap positions
- file and rust‑inhibiting primer for treated edges
With aluminum fenders you should also use clean tools and a gentle working method to avoid tool marks in the material.
Disassembly and installation of front fenders
Exact sequences vary by model. The following description is a general outline. Details such as torque settings or clip locations must be looked up in the vehicle‑specific documentation or the workshop manual.
1. Secure the vehicle and remove attached parts
- Park the vehicle on level ground and secure against rolling.
- Depending on the scope of work, remove the front wheel on the affected side to gain better access to the wheelhouse.
- Remove wheel arch liner(s): take out screws and clips, carefully pull out the liner.
- Remove front bumper, headlights or side sill trims where they overlap the fender. Sequence: see the workshop manual.
2. Remove the old fender
- Locate visible bolts at the A‑pillar, front panel and at the transition to the door.
- Check for hidden bolts under seals, covers and in the door jamb.
- Carefully remove the fender from the vehicle. Watch out for sharp edges and protect adjacent paint surfaces (e.g. with tape).
- Immediately inspect any rust or damage to the inner structure (inner fender liner, supports) and repair or treat as necessary.
3. Align and adjust the new fender
- Temporarily fit the new fender, tightening bolts only by hand.
- Adjust panel gaps to the door, hood, bumper and, if applicable, headlights. Small deviations can be corrected by shifting and using shims.
- For aluminum or tuning fenders, rework mounting holes if necessary. Always deburr and then protect with a suitable primer against corrosion.
- If the fit is satisfactory, remove the fender again and prepare it for painting.
After painting, reinstall the fender in the reverse order for final installation. Use the torque settings specified in the vehicle documentation for the fasteners.
Side panels and rear fenders: When to do it yourself and when to go to a professional shop?
Replacing welded side panels and rear fenders is significantly more complex than simply swapping a front fender. Typical tasks include:
- body measurement to rule out distortion
- drilling out spot welds and separating sheet layers
- clean definition of cut lines to preserve strength and appearance
- fitting the new side panel with all overlaps and tolerances
- welding according to manufacturer specifications, corrosion protection inside and out
If you do not regularly perform bodywork, you should generally have large structural parts replaced by a specialist shop and limit yourself to smaller sheet metal repairs (wheel arch repair, patch panels). The reason: mistakes in load‑bearing body parts can permanently affect handling, crash safety and panel gaps.
Fuel cap and filler door: Function and tightness in focus
Simple replacement of the fuel cap
Screw‑on fuel caps can usually be replaced without complications. Pay attention to:
- compatible thread or locking mechanism
- correct length and seal so the filler neck seals properly
- if applicable, any venting function and pressure equalization
When converting to lockable fuel caps, ensure that no error messages are triggered in the onboard diagnostics system (e.g. due to incorrect venting).
Replacement or adjustment of the filler door
When replacing a filler door or converting to a wider side panel:
- check hinge and strike points for corrosion and play
- set panel gaps to the side panel so the door does not rub
- inspect the seal around the fuel filler neck (no water ingress into the opening)
With wide‑body conversions the filler door may need to be offset or its contour modified. Welding and grinding should be carried out at a safe distance from the filler neck and the fuel system should be drained and rendered gas‑free beforehand. Strictly follow the manufacturer's instructions and applicable safety regulations.
Corrosion protection and post‑treatment
New fenders and side panels usually come with transport primer or bare metal. Proper sealing is decisive:
- Interior surfaces should be treated with cavity wax or suitable corrosion protection products, especially seams and overlaps.
- Exterior surfaces should be prepared according to the painter's specifications (sanding, degreasing, primer/filler, basecoat, clearcoat).
- Bolts and contact surfaces to the chassis can be treated with a thin corrosion protection layer if necessary, taking grounding points into account.
After installation, keep the vehicle dry for a few days until paint and sealants have fully cured (refer to the product data sheets for exact times).
Panel gaps and adjustment after installation
At the end of the installation, adjusting panel gaps is important — not only for appearance but also to avoid galvanic corrosion and paint abrasion from contact.
- use thin cardboard or plastic shims as spacers between panels
- check door opening and closing behavior: no contact with newly installed fenders or side panels
- headlights, bumper and hood must fit without stress; excessive tension can later cause cracks
Avoid bolting sheet metal parts "under tension". It is better to position parts correctly by proper adjustment and, if necessary, slight panel shaping.
Sources and parts overview
For an overview of available fenders, side panels and fuel filler caps for various US models, you can use the category Kotflügel, Seitenwände & Tankdeckel. There the parts are broken down by model and year, which simplifies selection.
Before ordering, always check the information in the vehicle registration and, if necessary, in the workshop manual and compare part numbers. This helps avoid wrong orders and unnecessary downtime.
Frequently Asked Questions
Can I change a front fender myself without a frame bench?
Yes, provided there is no structural damage to the longitudinals, A‑pillar or front panel. The simple replacement of a bolted front fender is possible in a well‑equipped home workshop. For exact disassembly and torque specifications, however, use the vehicle‑specific workshop manual.
Does a new fender have to be test‑fitted before painting?
Highly recommended. Small deviations are common, especially with reproductions and tuning parts. A test fit before painting prevents subsequent sanding and straightening on a freshly painted part and helps set panel gaps correctly.
Am I allowed to weld side panels and load‑bearing body parts myself?
Legally this is often not prohibited, but it is risky without suitable equipment and experience. Mistakes when welding load‑bearing parts can negatively affect structural strength and crash safety. For comprehensive structural repairs, a body shop specialized in structural work is usually the safer choice.