Brake Rotors for US Cars: Selection, Fitment, Installation
Brake discs for US cars: what to check before buying. Compare vehicle fitment, kit contents and relevant products.
Basics: Construction and Function of Brake Rotors
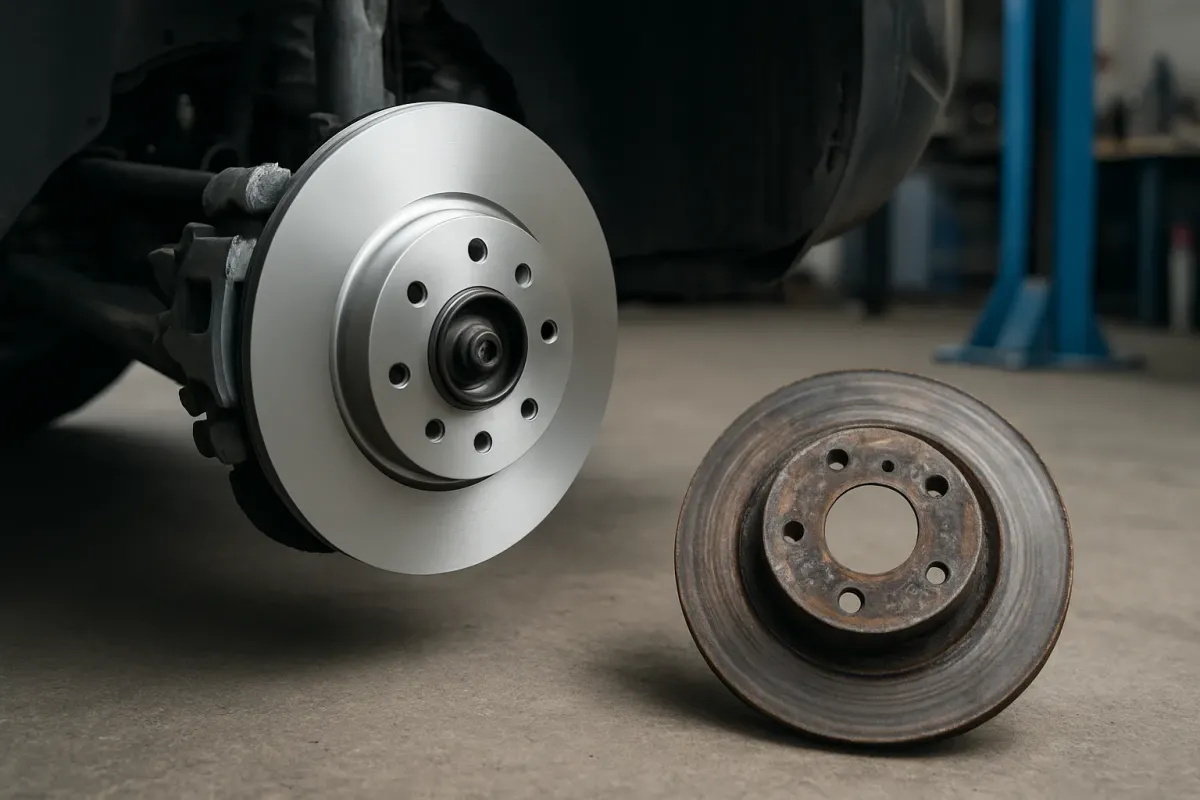
Brake rotors convert the vehicle's kinetic energy into heat. The brake pads press onto the rotors and thus slow the wheel. On US cars, very different rotor dimensions and types are fitted depending on model, model year and specification.
Typically you will find disc brakes on all four wheels of modern US vehicles. On older pickups and vans there may still be a drum brake at the rear, or there are different brake packages (e.g. “Heavy Duty Brake Package”) that use different rotor diameters and caliper configurations.
Finding the right brake rotor for your US car
For US vehicles the model designation alone is rarely enough to determine the correct rotor. Important are:
- Vehicle: make, model, model year, engine type
- Body variant (e.g. coupe, SUV, pickup, van)
- Axle: front or rear
- Brake system / brake package (standard, heavy duty, performance, etc.)
- Bolt pattern, number of wheel bolts and hub bore diameter
- Diameter and thickness of the rotor
As a first orientation you can open a suitable category for rotors, e.g. the general overview at Bremsscheiben. For specific vehicles like the RAM 1500 or Chevrolet Tahoe suitable sets with rotors and pads are listed there.
Using the Vehicle Identification Number (VIN)
On many US vehicles rotor dimensions changed within a model year. Always check the VIN and match it with the information in the parts catalog or shop. Often there are notes like “only for vehicles with 6 lug bolts” or information about rotor diameter.
Example: On the RAM 1500 DT from 2019 there are different versions, including for vehicles with 6 lug bolts. A corresponding front axle set is e.g. 2x brake rotors brake pads front for RAM 1500 DT 2019 - 2026 6 lug bolts.
Brake variants and special packages
US manufacturers often offer different brake packages, for example for towing or performance models. These differ e.g. in:
- Diameter and thickness of the rotor
- Ventilation (vented / solid)
- Caliper size and pad shape
If you are unsure, measure the existing rotors exactly (diameter, thickness, hat height) and compare with the technical specifications in the shop and the vehicle documentation.
Types of rotors: solid, drilled, slotted
Depending on use and driving style you can choose different rotor types:
- Solid rotors: simple, solid rotor, often used at the rear or on lighter vehicles.
- Vented rotors: two friction faces with ventilation channels in between, standard on heavily loaded front axles.
- Drilled and/or slotted rotors: additional holes or slots help evacuate gases and water and can reduce fading.
Drilled rotors are often offered together with matching pads as a set, for vehicles that frequently carry loads or tow, such as a Dodge RAM 1500. One example is the set drilled brake rotors brake pads front rear for Dodge RAM 1500 2002 - 2024.
Important: For road use drilled/slotted rotors should always be approved for your specific vehicle. If in doubt, check the approval documents and any national regulations.
Measuring: These dimensions are decisive
If you want to compare existing rotors with new ones, check:
- Overall diameter: measure with calipers or a tape measure.
- Rotor thickness: measure at the friction surface (not at rust edges).
- Hat height: distance from the hub mounting face to the friction surface, important for caliper position.
- Bolt pattern and number of holes: e.g. 5 or 6 lug bolts, typical bolt pattern depending on the US vehicle.
- Hub bore: the diameter of the centering bore.
Deviations in diameter, thickness or hat height can lead to squeal, uneven braking or fitment problems. If in doubt never “make it fit somehow”, get the correct rotor.
Preparing for installation
Before starting you should:
- Securely jack up the vehicle and prevent it from rolling.
- Have tools ready (ratchet/sockets, torque wrench, screwdrivers, piston retraction tool or C-clamp, wire for hanging the caliper).
- Have cleaner and, if needed, brake grease for the guide pins ready.
- Check new rotors and pads (dimensions, surface, any damage).
Dispose of old brake parts and brake dust in an environmentally responsible way. When working on brakes avoid inhaling dust, do not blow out with compressed air, use brake cleaner instead.
Installation: Step by step
The basic steps are similar on many US vehicles. Always follow the vehicle-specific repair manual and torque specifications.
1. Remove wheel and caliper
- Loosen wheel nuts, lift the vehicle and remove the wheel.
- Loosen brake pad carrier / caliper bolts.
- Remove the caliper and hang it with wire on the strut or chassis, never let it hang on the brake hose.
- If necessary remove the caliper bracket if it blocks the rotor.
2. Remove the old rotor
- Release any retaining screws of the rotor.
- Pull the rotor off the hub. With seized rotors tap gently with a rubber mallet or use the provided puller threads if present.
- Thoroughly clean the hub face (wire brush, cleaner), remove rust and dirt. The hub mounting surface must be absolutely flat.
3. Mount the new rotor
- Degrease the new rotor (remove transport protective oil with brake cleaner).
- Place the rotor on the cleaned hub, if necessary fix lightly with a retaining screw or a wheel nut.
- Reinstall the caliper bracket and tighten to the torque specified in the vehicle documentation.
4. Prepare pads and caliper
- Retract the brake piston carefully (e.g. with a piston retraction tool or C-clamp). Check the brake fluid level in the reservoir beforehand.
- Remove guide pins, clean and lightly lubricate with suitable brake grease (only in the designated areas).
- Clean the contact surfaces of the pads in the caliper bracket. Apply a thin layer of suitable brake grease only where metal slides on metal, not on the friction surfaces.
5. Reassembly
- Install new brake pads.
- Refit the caliper and tighten the mounting bolts to the specified torque (take values from the repair manual).
- Mount the wheel, tighten wheel bolts or lug nuts in a star pattern to the specified torque.
After installation, press the brake pedal several times until pressure builds up. Only then move the vehicle.
Bedding-in new rotors and pads
New rotors and pads must bed in together. Manufacturers often give precise instructions. Typical recommendations are:
- Avoid full-force stops from high speeds in the first kilometers.
- Perform several gentle to moderate stops so a uniform transfer film forms.
- Avoid sitting at a light with the brake held down for a long time if the brakes are very hot.
Ignoring bedding-in instructions can cause judder, noise or premature rotor wear.
Special considerations for US SUVs, vans and pickups
Many US SUVs and pickups regularly tow trailers or carry heavy loads. This subjects rotors to strong thermal stress. Drilled or vented rotors can have advantages here if selected to match the vehicle and usage.
Examples of typical applications:
- Heavy SUVs like Chevrolet Tahoe or GMC Yukon: rear sets of drilled rotors and pads are often used, e.g. 2x drilled brake rotors brake pads rear for Chevrolet Tahoe GMC Yukon 2007 -.
- Pickups like the RAM 1500 DT: various rotor versions are available front and rear, including versions specifically for models with 6 lug bolts.
- Modern vans like the Chrysler Voyager 2020+: often equipped with relatively large rear rotors, e.g. sets like 2x brake rotors brake pads rear for Chrysler Voyager 2020 - 2025.
When must rotors be replaced?
Typical reasons to replace rotors are:
- Falling below the minimum thickness (measure actual thickness with calipers, compare with the specified minimum in the vehicle documentation).
- Deep grooves, spalling or deep corrosion pits.
- Noticeable vibrations or judder when braking that can indicate lateral runout (warpage).
- Blue discoloration from overheating.
The minimum thickness is usually stamped on the rotor or listed in the workshop manual. If it is reached or fallen below, the rotor must be replaced. Do not have rotors resurfaced on suspicion and do not invent your own limits.
Avoid common mistakes when changing rotors
- Dirty hub mounting surface: leads to lateral runout and judder. Always clean thoroughly.
- Wrong or missing torques: applies to wheel nuts as well as caliper and bracket bolts. Always look up the values in the vehicle documentation.
- Old pads on new rotors: can cause poor braking performance and noise. In practice rotors should always be paired with new pads.
- Poorly routed brake lines: after assembly check that no lines or hoses are strained or pinched.
- Not degreasing the rotors: transport protection must be removed, otherwise stopping distance is significantly increased.
Examples of complete kits
Especially on US cars it makes sense to install complete axle kits with rotors and pads to achieve consistent braking behavior. Examples:
- Ford Edge / Fusion 2015–2021: 2x brake rotors + brake pads front for Ford Edge Fusion 2015 - 2021.
- Cadillac CTS / STS 2003–2008: 2x brake rotors + brake pads front for Cadillac CTS STS 2003 - 2008.
- Buick LeSabre / Century / Regal 1997–2005: 2x brake rotors + brake pads front for Buick LeSabre Century Regal 1997 - 2005.
These sets generally contain matched components, which makes selection easier. Still always check with the VIN and technical data whether the set fits your vehicle.
Frequently asked questions
Do I always have to replace both rotors on an axle?
Yes, rotors should always be replaced axle-wise. Differently worn or different rotor types left/right lead to uneven braking and can cause the vehicle to pull to one side under braking.
Where do I find the correct torque values for my US vehicle?
The correct torques for caliper, caliper bracket and wheel bolts are listed in the official vehicle documentation or the workshop manual. Do not rely on generic values from the internet; always check the manufacturer-specific specifications.
Can I simply have warped rotors resurfaced?
Resurfacing (turning) is only permissible if afterwards the rotor is not below the manufacturer-specified minimum thickness and the rotor is still within tolerances. Whether this is sensible for your vehicle can only be decided based on the dimension data in the vehicle documentation and an exact measurement.