Brake pads for US cars: selection, fit and installation
Brake pads for US cars: what to check before buying. Compare vehicle fitment, kit contents and relevant products.
Function of the brake pads in the US car
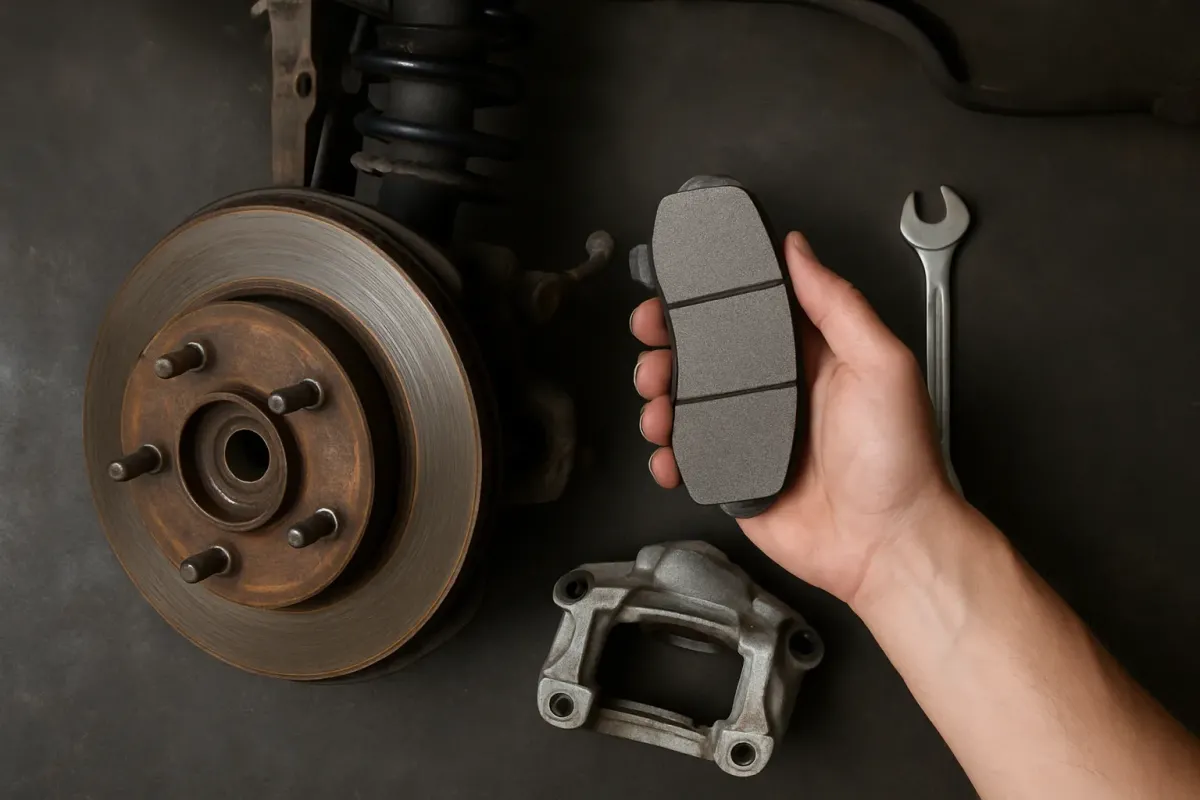
Brake pads are safety-relevant wear parts. They convert your vehicle's kinetic energy into heat by friction on the brake rotor. Especially on heavy US SUVs, pickups and vans, pads must withstand high braking energies and temperatures over long periods.
Worn or incorrectly selected brake pads lead to increased stopping distances, noises, uneven wear and in extreme cases to failure of the brake system. Regular inspection and correct replacement are therefore among the most important maintenance tasks that you as a hobby mechanic can perform yourself.
Types of brake pads and their characteristics
Brake pads differ mainly in the friction material. Common variants:
- Organic / NAO (Non Asbestos Organic): Softer pad, usually quiet and rotor-friendly, but tends to wear faster and produce more brake dust. Suitable for normal driving.
- Low-Metallic / Semi-Metallic: Contain metal content, are more temperature-stable and provide strong braking, but can produce more noise and put more stress on the rotor. Common on heavy vehicles like the Ford F-150 or Chevrolet Tahoe.
- Ceramic pads (Ceramic): Low brake dust, often very quiet and rotor-friendly. However, they usually have higher operating temperature requirements and can have less initial bite when cold (depending on the product).
Which compound makes sense for your US car depends on vehicle weight, use (city, towing, mountains) and your braking style. A heavy SUV like the Cadillac Escalade or Chevrolet Tahoe places different demands than a compact Pontiac Grand Am.
Finding the right brake pads for your US vehicle
The most important prerequisite is exact fitment. Incorrect pads either cannot be installed at all or lead to a spongy pedal feel, noise or uneven braking performance.
Important vehicle data
You need the following information to select brake pads:
- Manufacturer (e.g. Chevrolet, Ford, Jeep, Chrysler, Cadillac, GMC, Dodge, Pontiac, Oldsmobile)
- Model and generation (e.g. Jeep Grand Cherokee WK2, Cherokee KL, Chrysler Pacifica)
- Year of manufacture / model year
- Axle: front or rear
- Engine and, if applicable, 4x4 or heavy-duty brake package (relevant for many US pickups/SUVs)
Many US models had different rotor and caliper sizes within a generation. You can find details in the vehicle documentation or via the vehicle identification number (VIN). When in doubt, always check the data first, then order.
Typical examples of vehicle-specific pads are:
- Front brake pads for Jeep Cherokee KL 2014–2020
- Rear brake pads for Ford F-150 / Expedition 1996–2004
- Front brake pads for Chevrolet Tahoe / GMC Yukon 2000–2006
An overview can be found in the category Brake pads.
Check shape, thickness and included hardware
Even before installation you should compare the old and new pads:
- Shape of the backing plate (contour, cutouts, retaining tabs)
- Position of retaining tabs, bolt holes or guides
- Mounting for wear sensors (if present)
- Thickness of the friction material (new pad significantly thicker than the old one, but same backing plate thickness)
- Included springs, clips and anti-squeal shims
Pads should be able to be inserted into the guide rails without force and must not have noticeable play. If they bind during a test fit, the problem is usually rust, dirty guides or the wrong pad variant.
When should brake pads be replaced?
The replacement time is determined by wear and condition, not just mileage. Watch for the following points:
- Remaining pad thickness: As a rough guide, pads should be replaced at the latest when only a few millimeters of material remain. Specific minimum values are listed in the vehicle documentation.
- Wear indicator: Mechanical wear-warning tabs or electronic sensors indicate when the pads are worn.
- Uneven wear: Wedge-shaped worn pads, cracks or broken edges are reasons to replace.
- Noises and vibrations: Squeal, grinding or tramlining noises can indicate pad issues or worn rotors.
- Overheating: Glazed pads (shiny, hard surface) after severe overheating should be replaced.
Tools and preparation for pad replacement
For most US car disc brake systems you need:
- Jack and jack stands with sufficient load rating
- Lug wrench or impact wrench
- Socket and box wrenches (often SAE sizes on older US vehicles)
- Possibly Allen or Torx bits for guide pins
- Piston retraction tool or a suitable C-clamp
- Wire or a hook to hang the caliper
- Wire brush and possibly a small file for cleaning the pad guides
- High-temperature brake paste (ceramic- or metal-free, use sparingly)
- Brake cleaner and lint-free rags
Check the specified torque values for caliper bracket, guide pins and lug nuts in the manual or workshop manual beforehand. These values are vehicle-specific; do not guess here.
Step-by-step: installing brake pads (disc brake)
The exact procedure depends on the vehicle, but the basic process is similar. Below is a general scheme for many US cars with disc brakes on the front axle:
-
Secure the vehicle
Park the vehicle on level ground, engage a gear or set the selector to "P", apply the parking brake. Slightly loosen the lug nuts, raise the vehicle and securely support it on jack stands. Remove the wheels.
-
Remove caliper
Loosen the caliper guide pins or caliper bolts on the back of the caliper. Carefully remove the caliper and hang it with wire on the strut or frame so there is no tension on the brake hose.
-
Remove old brake pads
Pull the pads out of the guides. Note or photograph any retaining springs and clips to know their orientation for reassembly. Check pads and rotor for uneven wear.
-
Clean guides and sliding surfaces
Clean the pad seats on the caliper bracket with a wire brush and, if necessary, a file to remove rust and dirt until bare metal is visible. Do not change material thicknesses. Check guide pins for free movement and boots for cracks. If necessary, clean the pins and re-lubricate with suitable guide-pin grease.
-
Retract the caliper piston
Before fitting the new, thicker pads, the piston must be pushed back. Place an old pad as a pressure plate in front of the piston and slowly and evenly retract it with a piston retraction tool or a C-clamp. Check the brake fluid level in the reservoir while doing this so nothing overflows.
Note: On some rear calipers with an integrated parking brake the piston must be screwed in instead of pushed back. Be sure to consult the vehicle-specific instructions for this.
-
Prepare new pads
Unpack the pads and avoid touching the friction faces with greasy hands. Fit anti-squeal shims correctly. A very thin layer of high-temperature paste can be applied to the back of the pads or contact points on the backing plate – never on the friction surface or on the rotor.
-
Install new pads
Insert the pads into the cleaned guides. They should fit freely but without noticeable play. If necessary, fit the supplied clips and springs according to the old parts or the installation instructions.
-
Mount caliper
Carefully position the caliper over the new pads and the rotor. Ensure the piston dust boot is not pinched. Tighten guide pins/slide bolts to the specified torque values (refer to vehicle documentation for the values).
-
Finishing work on the axle
Fit the wheel and hand-tighten the lug nuts. Lower the vehicle and then tighten the lug nuts in a criss-cross pattern to the specified torque. Repeat the procedure on all wheels to be serviced.
-
Bleed and check the brake system
Before driving, depress the brake pedal several times until a firm bite point is present. Check the brake fluid level and top up to the specified level if necessary (use only fluid approved for your vehicle). If the pedal feels spongy or travels unusually far, inspect and, if necessary, bleed the brake system.
Bedding in new brake pads
New pads must bed into the rotor so that an even friction layer forms. Typical procedure (follow manufacturer instructions if different):
- Avoid heavy full stops in the first 200–300 km.
- Perform multiple moderate stops from medium speed (e.g. 80 to 30 km/h) and allow cooling intervals between them.
- Avoid long stationary braking with a hot system (e.g. after leaving the highway) – risk of pad deposits on the rotor.
This achieves a clean contact surface between pad and rotor and reduces later grabbing or noise.
Typical mistakes when replacing brake pads
- Changing only one side: Always replace pads axle-wise, otherwise you risk uneven braking behavior.
- Not cleaning the guides: Guide problems lead to unevenly worn pads and scraping noises.
- Missing or incorrectly mounted clips: Can cause rattling and uneven retraction of the pad.
- Too much brake paste: Excess paste can get onto the friction surfaces and impair braking performance.
- Ignoring torque specs: Over- or under-tightened fasteners are a safety risk. Always use the values from the documentation.
Special considerations for US SUVs, vans and pickups
Heavy US vehicles like the Chevrolet Astro, GMC Safari, Ford Expedition or Jeep Grand Cherokee put a lot of strain on the brake system. Pay special attention to:
- The correct pad type (possibly a "Heavy Duty" brake system)
- Clean and freely moving guide pins
- Good ventilation of the brakes, no bent splash shields
- Regular checks when towing or driving in mountains
There are specific pad sets for such vehicles, for example:
- Front brake pads Chevrolet Astro / GMC Safari 2003–2005
- Rear brake pads Cadillac Escalade / Chevrolet Tahoe from 2003
- Rear brake pads Jeep Grand Cherokee / Dodge Durango from 2011
Brake pads and rotors: when to replace both?
Whether you should replace the rotors when changing pads depends on their condition:
- Grooves and lips: Deep grooves, scoring or a pronounced lip at the rotor edge indicate a rotor replacement.
- Minimum thickness: A minimum thickness is stamped into the rotor. If the measured thickness is below or close to this value, the rotor should be replaced.
- Rust and cracks: Severe rust pitting or cracks are a safety risk and require immediate replacement.
The permissible wear limits and thicknesses can be found in the vehicle documentation or on the respective rotor.
Frequently asked questions
Can I run different pad types front and rear on my US car?
Technically this is usually possible, but matched pad compounds on the front and rear are common. It is important not to negatively affect brake balance. Follow the recommendations in the vehicle documentation or from the pad manufacturer.
Do I need to replace the brake fluid after changing the pads?
Changing the pads alone does not necessarily require a fluid change. Brake fluid is hygroscopic and should be changed at the intervals specified by the manufacturer. Check the service schedule or the vehicle manual.
What torque values apply to the caliper and lug nuts on my US car?
The torque values vary depending on vehicle, year, engine and installed brake system. Do not rely on general values from the internet; always use the specifications from the owner's manual or a vehicle-specific workshop manual.